


Choose the right sandpaper grit size and say goodbye to sanding failures
Nov 03, 2025
Leave a message
Sandpaper is an indispensable tool for DIY crafts, furniture restoration, and industrial processing. But have you ever scratched your workpiece or lost efficiency by choosing the wrong grit? Actually, there's a unified standard behind the "coarseness" of sandpaper. Mastering this standard allows you to precisely control your sanding results. This article will explain the core knowledge of sandpaper grit, from standards to applications.
Ⅰ. What is sandpaper grit? The core standards are these two
Sandpaper grit, in simple terms, refers to the size of the abrasive particles on the sandpaper. The smaller the grit number, the coarser the particles; the larger the number, the finer the particles. There are currently two mainstream grit standards in the world, which need to be distinguished when used domestically:
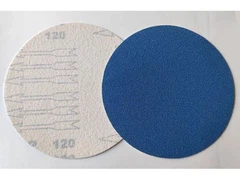
1. The Chinese standard (GB/T 9258.1) uses a "P" + number designation, such as P80 and P120. The number directly corresponds to the average abrasive particle size (unit: microns). This is the most commonly used designation in the domestic industrial and consumer markets, so consider this designation when purchasing.
2. The international standard (ISO 6344) follows the same logic as the Chinese standard and also uses a "P" + number designation. The numerical range and particle size correspondence are fully compatible. For example, P240 represents fine-grit sandpaper in both domestic and international standards and can be used interchangeably.
Tips: Some imported sandpaper may be marked with "mesh number" (such as 100 mesh). The mesh number refers to the number of holes in the screen per square inch, which can roughly correspond to the P number (such as 100 mesh ≈ P100), but the accuracy is not as good as the P number standard. It is recommended to give priority to products marked with P number.
Ⅱ. Commonly used particle sizes are divided into 3 categories, corresponding to different grinding scenarios
According to the coarseness and fineness of the grain, sandpaper can be divided into three categories: coarse, medium and fine. Different scenes require different grain sizes to avoid "one wrong step and all wrong steps":
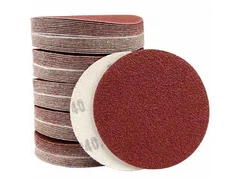
1. Coarse particle size (P40-P80): Special for "shaping", fast material removal
Grain Characteristics: Large grains with wide spacing between them produce strong cutting forces during sanding, leaving deep scratches on the workpiece surface.
Applicable Applications: - Preliminary sanding of wood and metal blanks to remove burrs and sharp edges; Complete removal of old furniture and old paint; - Reshaping large workpieces (such as rough shaping of wood carvings).
Note: Coarse-grit sandpaper is only used for "priming." Subsequent secondary sanding with medium- or fine-grit sandpaper is required, otherwise the surface will be rough.
2. Medium particle size (P100-P240): Main force for leveling and connecting coarse and fine particles
Grain Characteristics: Medium-grit sandpaper has a moderate grain size, effectively removing coarse scratches without over-cutting, making it the core element of sanding.
Applications: Surface leveling after rough sanding (e.g., smoothing the grain of wood after sanding); pre-treatment of metal surfaces (e.g., removing rust and marks before painting); and general sanding of plastic and resin parts (e.g., trimming model parts).
Key Function: Medium-grit sandpaper determines the "basic flatness" of the final surface. If this step is not completed thoroughly, scratches will be difficult to conceal with fine sanding.
3. Fine grain (P320-P1000+): Polished finish to enhance texture
Particle Characteristics: Fine, evenly distributed particles create a smooth surface after polishing, leaving scratches extremely shallow or even invisible to the naked eye.
Applicable Applications: - Final polishing before applying paint or wood wax (e.g., fine leveling before painting furniture); - Pre-polishing metal surfaces (e.g., removing scratches from stainless steel); - DIY detail polishing (e.g., fine polishing of ornamental walnuts and jade).
Advanced Uses: Ultra-fine particle sizes (e.g., P1500 and P2000) are commonly used for automotive paint restoration and polishing optical instruments, but are not required for general applications.
Ⅲ. 3 practical tips to double the polishing effect
1. Gradual Progression: Progress from coarse to fine grits gradually, avoiding any intermediate grits. For example, when sanding wood, we recommend sanding in the order of "P80 → P120 → P240 → P400." Each time you change grit, sand perpendicularly to the direction of the previous sanding to more easily detect any remaining scratches.
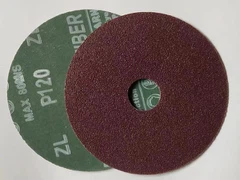
2. Choose sandpaper based on the material: Different materials require different abrasives. For example, use aluminum oxide sandpaper (wear-resistant) for metal, silicon carbide sandpaper (less prone to blocking the wood grain) for wood, and sponge sandpaper (conforms to curved surfaces and avoids wear-through) for painted surfaces.
3. Clean sandpaper debris promptly: During sanding, debris can clog the sandpaper, reducing sanding efficiency and causing roughness. Regularly clean the sandpaper surface with a dry brush or gently tap the sandpaper to remove debris and extend its life.
There's no "good" or "bad" sandpaper grit, only "suitability." Remember the core logic: coarse grinding for shaping, medium grinding for leveling, and fine grinding for polishing. Then, choose the right sandpaper type based on the material. Whether you're restoring furniture, doing DIY crafts, or working on industrial applications, you can easily control the polishing effect and elevate your work to a higher level of quality.
Send Inquiry